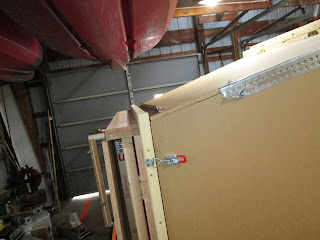
Here you can see the Test Chamber folded up and being matched up to the Connector. I added two 2X4 legs to the top piece to stabilize the Test Chamber when it is folded up. These legs can be removed after the two sections have been mated up. Two handles have been added for control and two adjustable draw clamps on each side. When they are latched they hold the two parts together.
It may be hard to see but a 2X2 stop piece has been added to the 3 frame sides and a piece of weather stripping added for a good air seal. Remember the Test Chamber slides into the Connector and the 2X2 acts as a stop.
Installing this little piece of 2X4 had to be the most difficult part of this entire job. The piece acts a support ledge for the bottom piece of the Connector. If not for this piece the bottom would go to the floor. making assembly more difficult. Crawling into this 12" high space was no picnic for this senior citizen.
But here it is assembled in all it's glory. Twelve feet of pure KidWind fun.
Here is the view from the exhaust end of the wind tunnel with the blade screen in place.
Would it dis-assemble and roll as planned? Yes indeed. After unclamping the Test Chamber I was able to roll it away. The clamps holding the Test Chamber to the Platform will be replaced with adjustable draw clamps soon. The Connector folded down and none of the clamps got in the way. The Test Chamber can be removed from the Platform and folded flat. Same goes for the platform. Then the two can be tied together with a ratchet strap and put on a furniture dolly for transport or storage.
Tomorrow I will roll the three parts, Fan with Connector, Platform and Test Chamber out in the driveway and make the assembly to see how it goes. Then it will be time to wire up the control panel and move some serious air!


No comments:
Post a Comment